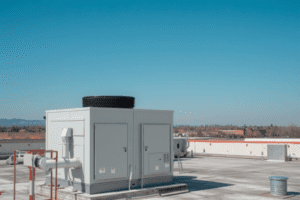
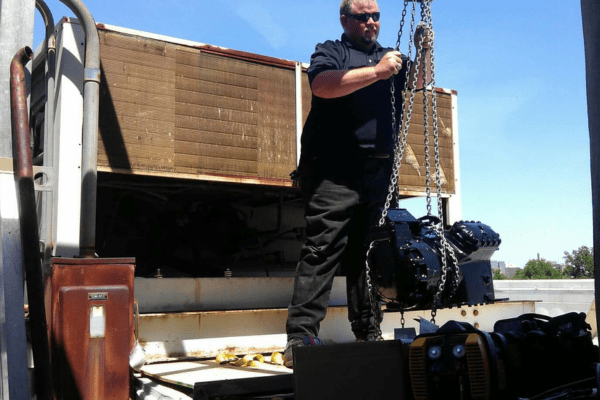
Installing a remanufactured compressor is one of the most cost-effective ways to restore performance in a commercial HVAC or refrigeration system. When done correctly, a remanufactured HVAC/R compressor delivers OEM-level reliability while reducing downtime and capital expense.
However, the installation process begins well before the compressor is set in place. Skipping critical preparation steps can shorten compressor life, cause repeat failures, and create warranty issues.
This guide outlines the essential steps to take before installing your remanufactured HVAC/R compressor, with a focus on acid testing, proper evacuation targets, and filter-drier strategy. These steps are especially important in commercial HVAC and refrigeration systems where failures are costly, and uptime is critical.
Why Pre-Installation Steps Matter
When a compressor fails, it rarely does so in isolation. Acid formation, moisture, debris, and oil breakdown often remain in the system after the failure. Installing a remanufactured compressor into a contaminated system exposes it to the same conditions that caused the original failure.
The goal of proper pre-installation preparation is simple: remove contaminants, stabilize the system, and create a clean operating environment for the new compressor.
When these steps are followed, remanufactured commercial hvac/r compressors routinely achieve long service life and stable performance.
Step 1: Identify the Cause of the Original Compressor Failure
Before any testing or cleanup begins, determine why the original compressor failed. Common causes include:
- Electrical burnout
- Acid formation from moisture or overheating
- Loss of oil circulation
- Floodback or slugging
- Long-term overheating due to airflow or load issues
Understanding the root cause helps guide the cleanup strategy. A burnout failure requires far more aggressive cleanup than a mechanical wear issue.
Documenting failure conditions also protects both the installer and the equipment supplier.
Step 2: Acid Testing the Refrigeration System
Why Acid Testing Is Critical
Acid in the refrigeration system is one of the most common reasons for repeat compressor failures. Acid forms when refrigerant, oil, moisture, and heat combine. Electrical burnouts are a frequent trigger, but acids can develop in any overheated or contaminated system.
If acid is not removed, it attacks motor windings, bearings, valves, and insulation. Even a properly remanufactured compressor will fail quickly in an acidic environment.
How to Perform Acid Testing
Acid testing should be done on the oil removed from the failed compressor or from the system oil reservoir. Use an approved acid test kit designed for refrigeration oil.
Results typically fall into three categories:
- No acid detected
- Mild acid presence
- Severe acid contamination
Each result dictates a different cleanup approach.
Responding to Acid Test Results
If no acid is detected, proceed with standard cleanup and filtration. If mild acid is present, additional filter-drier capacity and oil changes are recommended. If severe acid is detected, the system must undergo an aggressive cleanup process that includes suction-line acid-core driers, oil replacement, and extended system operation before final cleanup.
Never install a remanufactured compressor into a system with confirmed acid contamination without first addressing the contamination.
Step 3: System Cleanup and Flushing Strategy
When Flushing Is Necessary
System flushing is often required after burnouts or when heavy contamination is present. Flushing removes residual oil, carbon, metal particles, and acid from piping and heat exchangers.
Flush agents should only be used according to manufacturer guidelines, and all flush residue must be removed before evacuation.
Not every system requires full flushing, but failing to flush when needed is a common cause of premature compressor failure.
Step 4: Filter-Drier Strategy Before Installation
Why Filter-Driers Matter
Filter-driers are the system’s last line of defense against moisture, acid, and debris. Choosing the right filter-drier strategy is one of the most important decisions before installing a remanufactured compressor.
Improper drier selection can restrict oil flow, trap contaminants in the system, or fail to remove acids effectively.
Liquid-Line Filter-Driers
At a minimum, install a new liquid-line filter-drier any time a compressor is replaced. This drier protects the expansion device and helps absorb residual moisture.
For contaminated systems, consider oversized or high-capacity liquid-line driers.
Suction-Line Filter-Driers
Suction-line driers are recommended after burnouts or severe contamination. These driers capture acid and debris before they reach the compressor.
Important best practices include:
- Use suction-line driers only temporarily
- Monitor the pressure drop across the drier
- Remove and replace with a standard suction strainer after cleanup
Leaving suction-line driers in place for long periods can restrict oil return and reduce system efficiency.
Step 5: Oil Considerations Before Installation
Understanding Oil Condition and Compatibility
Oil quality and compatibility are critical to compressor life. In many cases, the oil from the failed compressor is contaminated and must be replaced.
Compressors Unlimited typically ships remanufactured compressors with mineral oil or POE oil based on the known application for that compressor model. In some cases, compressors are shipped without an oil charge because oil is drained after testing.
The contractor is responsible for:
- Confirming refrigerant type
- Ensuring oil compatibility with the refrigerant
- Adding the correct oil charge during installation
Never assume oil compatibility without verification.
Step 6: Evacuation Targets and Moisture Removal
Why Evacuation Is More Than Pulling a Vacuum
Evacuation removes air and moisture from the system. Moisture left behind leads directly to acid formation, oil breakdown, and corrosion.
A shallow vacuum is not enough. Proper evacuation is essential before introducing refrigerant.
Recommended Evacuation Targets
For commercial HVAC and refrigeration systems, best practice evacuation targets are:
- Pull vacuum to 500 microns or lower
- Isolate the system and confirm it holds below 1,000 microns
- If pressure rises quickly, moisture or leaks are still present
Triple evacuation with dry nitrogen between pulls is recommended for contaminated systems or burnouts.
Evacuation should never be rushed. Moisture removal takes time, especially in large systems.
Step 7: Pressure Testing and Leak Verification
Before evacuation and charging, pressure test the system using dry nitrogen. This confirms system integrity and prevents leaks that allow moisture to re-enter.
A successful pressure test ensures:
- Clean evacuation
- Stable system operation
- Reduced risk of future acid formation
Skipping pressure testing often leads to repeat service calls and compressor damage.
Step 8: Final Pre-Installation Checklist
Before installing your remanufactured compressor, confirm the following:
- Acid testing completed and addressed
- System flushed if required
- Proper filter-drier strategy implemented
- Oil compatibility confirmed
- Evacuation completed to target micron levels
- System pressure-tested and leak-free
Completing this checklist protects both the compressor and the system.
Why These Steps Protect Your Investment
Remanufactured HVAC/R compressors are built to perform like new, but they rely on a clean, stable system to reach their full service life.
Following proper preparation steps:
- Reduces repeat failures
- Protects motor windings and bearings
- Prevents acid-related damage
- Improves system efficiency
- Supports warranty coverage
Post Installation Tips:
- Check for any post-installation instructions for your specific compressor model.
- Check the oil charge after the system has run for a short time.
- Retorque the bolts as needed to prevent any leaks
These steps also demonstrate professionalism and technical competence to customers and facility managers.
Common Questions Technicians Ask
Do I need to acid test every compressor replacement?
Yes. Acid testing is inexpensive and prevents costly failures.
What happens if the evacuation does not reach the target microns?
Moisture remains in the system, which can lead to acid formation and early compressor failure.
Are suction-line driers always required?
They are recommended after burnouts or heavy contamination, but should be removed after cleanup.
A Smarter Installation Approach
Installing a remanufactured compressor is not just about swapping parts. It is about restoring system health and reliability.
At Compressors Unlimited, we remanufacture commercial HVAC and refrigeration compressors to OEM standards and back every unit with a limited warranty. Proper system preparation ensures that the investment delivers long-term performance.
If you have questions about oil selection, cleanup procedures, or installation best practices, our team is available to help before the compressor is installed, not after problems occur.
Taking the right steps before installation is the difference between a successful repair and a repeat failure.